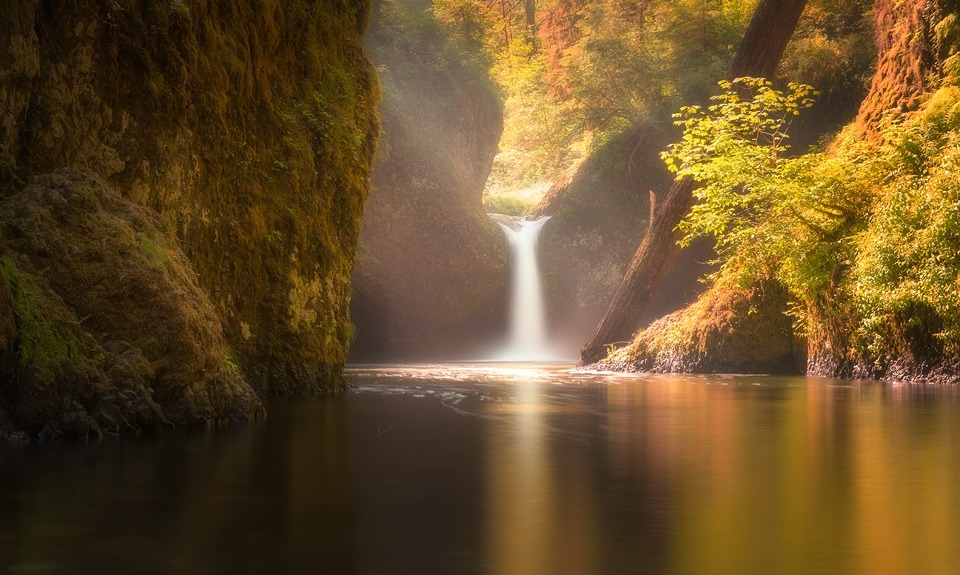
Golden Punchbowl Falls, Oregon
A Return to the U.S.
Last night my wife and I enjoyed a couple of cold pale ales at a little, tucked-away brewery along the Columbia River in Oregon. It’s been 3 years since we were last in the region, and I have to say, it’s lovely to be back.
I spent last weekend speaking at a photography conference in Chicago, called Out of Chicago. It was nice to be surrounded by fellow photography nerds. It was also nice to meet many of the attendees who subscribe to my newsletter, use the Easy Panel, and Raya Pro. I even met two photographers who run a photography school in Chicago and who have installed the Easy Panel on all of their machines!
My lecture was titled ‘GOING FROM HOBBYIST TO PROFESSIONAL PHOTOGRAPHER: THE THINGS I WISH I KNEW BEFORE I STARTED’.
Most of my working life as a photograph is spent alone, or with my wife. Sometimes I shoot with other photographers. I don’t usually host photowalks or do any workshops. It was interesting to step out of that preferred isolation into a socially frantic weekend.
I must say I enjoyed connecting with so many photographers. I also enjoyed the speaking aspect, including being a part of a panel discussing the state of HDR in today’s photography world.
But now that I have resumed my regular role as a photographer and online business owner, I’m back taking things easy. This morning I was knee-deep in a freezing river, trying to capture Elowah falls.
I’m not sure I’m fully cut out for a public life like some photographers, although I know it is necessary to spread my name. I think I prefer the simplicity of being on the road, searching for the next image. Having said that, the conference was such an enjoyable experience, it has encouraged me to come out of hiding a little bit more, and meet more passionate photographers.
I’ll be in the U.S. for the next 6 weeks, 4 of which will be spent in Arizona. I just looked at the temperatures over there at the moment. I’m thanking our lucky stars I’ll be shooting at sunrise and at night more often than not. That midday heat looks relentless…but those landscapes are worth it!
________________________________________________________
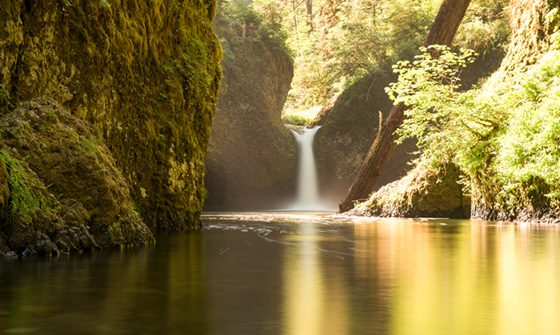
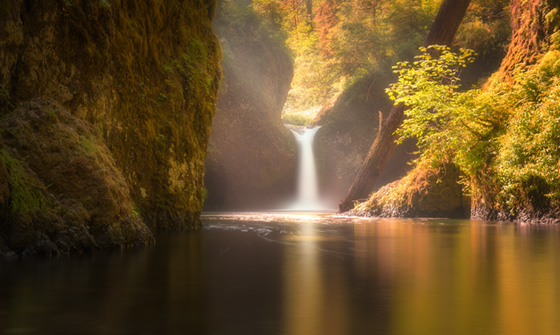
How I Created The Image – Before/After Post-Processing


The Cool Bits -Technical Info
Processing Time: 25 minutes
Exposure Blending method: Apply Image in Raya Pro
No. of Exposures: 2
Shutter Speed: 13 seconds (+2 exposure) & 3 seconds (0 exposure)
EV Range: 0, +2
Aperture: f/8
ISO: 100
Focal Length: 56mm
Lens: Nikon 24-70 f/2.8
Camera: Nikon D800
Plugins: N/A
Luminosity Masks: N/A
Workflow Explanation -Dragon Eggs
This image was created using Raya Pro – The Photoshop Plugin.
I was about knee-to-waist-deep in the freezing water for this image. I wasn’t content with my foreground options so I got closer to the waterfall and went for a narrower focal distance than I usually shoot.
After a few test shots, I decided that smooth water in the foreground, and the waterfall, would compliment this scene more than the textured, unsettled water that the short exposures produced. So I put on my B&W 10-stop ND filter.
By the way, if you’re a landscape photographer, be sure to check out my latest article: 32 Shooting & Planning Tips To Instantly Improve Your Landscape Photos
There’s a huge amount of useful information in there for fellow landscape photographers.
I added warmer, autumnal tones by using the Autumn Colours function in Raya Pro, and then reduced the opacity so I came out with a gentler, golden glow from the scene.
This is very different to my recent landscapes which tend to be darker and moodier. But I enjoyed changing things up here and creating a more ethereal, light glow to the entire scene.
Although there were some faint light rays in the original image, they weren’t very strong, so I exaggerated them slightly using the technique used in my newest YouTube tutorial: Create Gorgeous Light Rays in Your Landscapes in Photoshop
I softened the strong details in the scene with the Orton Effect. Sometimes in these images, the fine details from all of the rocks and leaves can be a little overwhelming, at least for me. So I like to be more selective about which details to keep, and which to emphasise. You can see how to create the Orton Effect here, if you don’t use Raya Pro: Quick Photoshop Secrets 7: How To Create a Dreamy Orton Effect
I made sure to keep the left side of the image dark, brightening the waterfall, which is our main area of interest, and keeping the right hand side nicely exposed for. I feel that this lends a nice balance of contrast to the whole scene.
And I finished by creating a gentle custom vignette that you can learn to do here: Quick Photoshop Secrets 9: Awesome Vignette For a Moodier Scene.
Finally, the image was sharpened and resized using my free sharpening tools, which you can download here: Quick Photoshop Secrets 16: Perfect Sharpening & Resize for the Web
As always, I hope you found this useful.
Jimmy

This entry was posted on Friday, July 1st, 2016 at 8:48 am
You can follow any responses to this entry through the RSS 2.0 feed.


Awesome image as usual, Jimmy. Glad to hear you are enjoying the U.S.
Are you still bracketing your photos when shooting? It seems like you are now exposing for different areas of the scene rather than firing off a few brackets. I’ve gotten pretty good at blending in Photoshop now but I think I need to slow it down in-camera rather than shooting off brackets.
Hi Brad,
I still bracket my images for simple scenes, but for ones with moving objects or long exposures, then I usually manually bracket. I’m glad to hear you’re happy with your blending progress 🙂
as always, thanks Jimmy. Amazing work and information that we all can’t get enough of. Hope your trip to Oz was a ripper mate!
Beautiful image, Jimmy! Love your work and love that you share this with us, I’m really looking forward to seeing more US images!
Great image, and I must say, you manage to create awesome dark AND light landscape images. 😉 One question: How strong was the orton effect on this image? I got the raya plugin as well, but i’m not sure about the opacity of the orton layer… What’s your usual range here? Very low I guess..
I am unsure what Jimmy used for this particular image but typically between 20-40% opacity is best. I use it for most all of my images and that’s the range I stick with. Hope this helps!
Thanks! 😉
Hi there, yes, it really depends on the scene and your personal taste. I think the Orton Effect in this image, at its strongest was 25%.