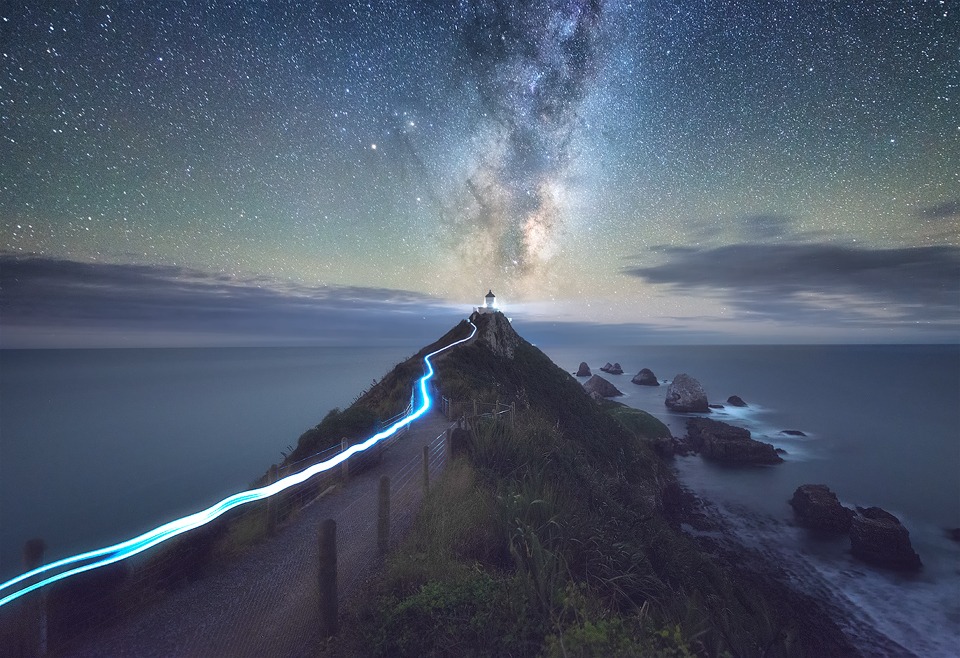
Light Trail, Milky Way, Light House
Huge Photography Sale
Sale has now ended!
Hi guys!
I only run two sales on all of my products each year, and there is only a few days left of this one. You can get 25% off any or all of my courses, including Raya Pro.
Sale ends on Monday 20th of June at 11:00am GMT
Download The Complete Jimmy McIntyre Collection
Just $108.74
For the first time, you can get my entire collection, containing 3 courses (The Art of Digital Blending, Art of HDR & Art of Cityscapes), the Raya Pro bundle (Raya Pro, including Mastering Raya Pro course), and a bonus Photoshop beginners course.
Add this to your cart:
Get Raya Pro & Mastering Raya Pro course
Just $52.49, saving $37.51 if you bought the products separately.
Check it out! http://www.shutterevolve.com/raya-pro-the-ultimate-digital-blending-workflow-panel-for-photoshop/
Raya Pro
Was $44.99 but is now just $33.74
Check it out! http://www.shutterevolve.com/raya-pro-the-ultimate-digital-blending-workflow-panel-for-photoshop/
____________________________________
And Also Check Out My Best-Selling Photography Courses
Art of Digital Blending: http://www.shutterevolve.com/luminosity-masks-tutorials-digital-blending-course/
Art of Cityscapes: http://www.shutterevolve.com/art-cityscape-photography-tutorials/
Art of HDR: http://www.shutterevolve.com/hdr-photomatix-tutorial/
________________________________________________________
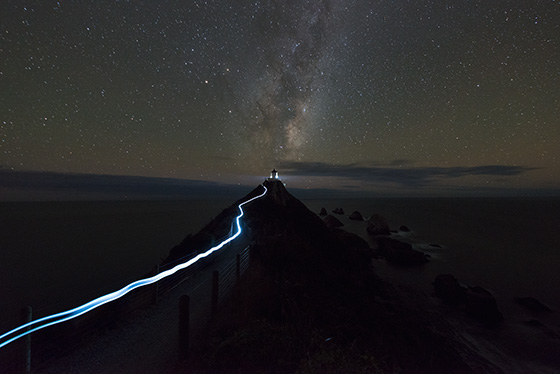
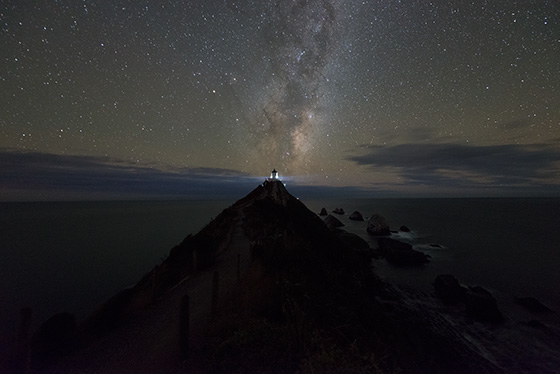
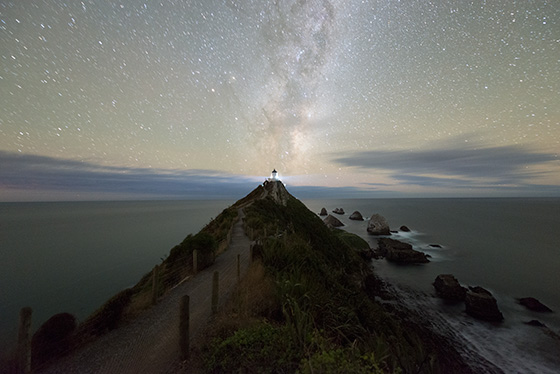
How I Created The Image – Before/After Post-Processing
The Cool Bits -Technical Info
Processing Time: 40 minutes
Exposure Blending method: Manual masking
No. of Exposures: 3
Aperture: f/2.8
ISO: 5000
Focal Length: 14mm
Lens: Nikon 14-24 f/2.8
Camera: Nikon D800
Plugins: Topaz DeNoise
Luminosity Masks: used to create softer shadows
Workflow Explanation – Milky Way Light Trails
This image was created using Raya Pro – The Photoshop Plugin.
Thank you to my wife, Rachel for running along this path at with her iPhone. That’s how I captured the light trail. It took her 3 goes before I was able to capture it cleanly. Good job she’s a competitive runner!
This was a straight forward image to shoot and process. I shot one longer exposure at 1 minute 30 seconds for the foreground. A separate exposure for the stars at 25 seconds, and a third exposure for the light trail, at 20 seconds.
I blended the foreground exposure and the star exposure by manually masking. For the light trail I just placed that layers on the top of the layer panel, changed its Blend mode to Lighten, and voila! the light trails blended nicely into the scene.
Before all of that I’d added my usual colder cast to the scene, that I like to give my astro shots. This was done with the temperature slider in ACR.
After that, the processing was easy. Just a few contrast adjustments, the Orton effect from Raya Pro, and some selectively applied noise removal with Topaz DeNoise.
And I finished by creating a custom vignette that you can learn to do here: Quick Photoshop Secrets 9: Awesome Vignette For a Moodier Scene.
Finally, the image was sharpened and resized using my free sharpening tools, which you can download here: Quick Photoshop Secrets 16: Perfect Sharpening & Resize for the Web
As always, I hope you found this useful.
Jimmy
This entry was posted on Friday, June 17th, 2016 at 6:31 pm
You can follow any responses to this entry through the RSS 2.0 feed.



Great tutorial Jimmy, thank you ..what lens did you use for this? I just noticed your left side of the sky “stars” is not as pin sharp as the right one.. I noticed this fault before with samyang lens in discussion.. Is that it or is it something else?
Looks like he used the Nikon 14-24mm f/2.8, and shot at 14mm, wide open. It’s listed under “The Cool Bits – Technical Info” pane on the right side at the beginning of the write up.
OK thanks Justin, I did not see it there.. 🙂
Great stuff though. Such an amazing tutorial. Thank for this Jimmy.