Moeraki Boulders and Calm Waters
Moreaki Boulders
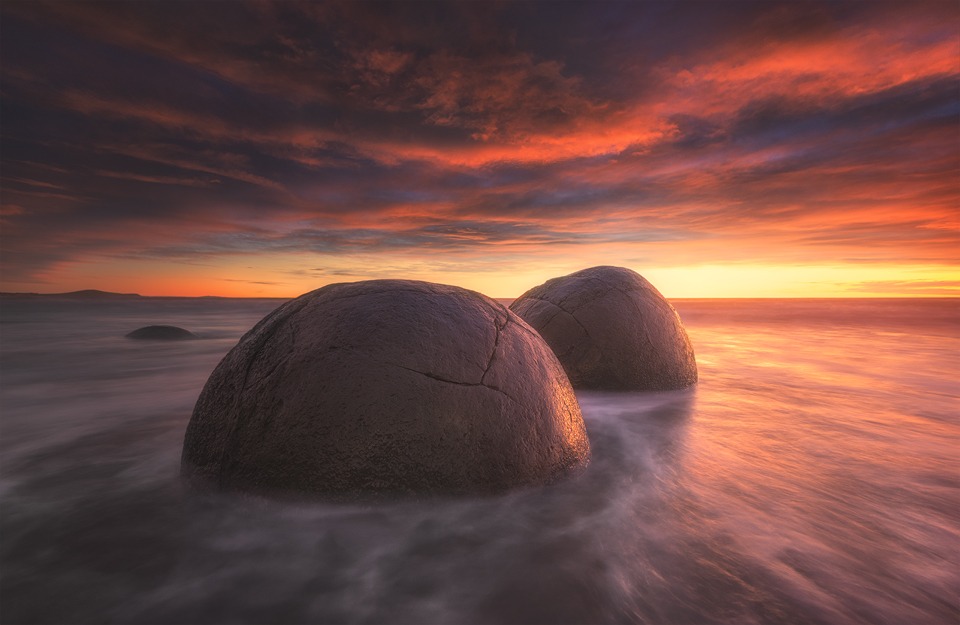
This sunrise at Meoraki was probably one of the most beautiful I’ve ever seen. It lasted for about 45 minutes and just kept getting better. The beach was packed with photographers. Since this is a very easy location to get to, I had expected that to be the case.
 Fortunately I was the first photographer to arrive at the boulders, and claimed these two as my own. 15 minutes after I’d arrived, all of the other interesting rocks were crowded around by photographers. Nobody joined me in shooting these two, mainly because I was right up close to them shooting. It would have been very difficult to photograph the boulders with me virtually on top of them.
I always like to get up close and personal to an interesting foreground subject. The benefit of this, for me anyway, is that my images seem to generate more depth with a closer foreground. The more we move in on a subject, the more textures and features we can draw out of it.
The disadvantage of being so close to foreground subjects when shooting seascapes is that you tend to get drenched. I had rolled my pants up, and was wearing water-shoes. Despite this, I was soaked from the chest down. My camera wasn’t dry either. As always, I had a couple of packs of soft Kleenex handy to dry the lens.
By the way, a couple of photogs emailed me saying I should be using a microfiber cloth to dry my lens because the Kleenex can damage your glass. Honestly guys, I just don’t see it. The things my glass has experienced over the years, including extremely harsh weather, sand storms and being dropped, far outweigh a gentle wipe with a soft Kleenex now and then. And let’s say for a minute that we really shouldn’t be using Kleenex, as a full time photographer, can you imagine how many cloths I would need, how often I’d need to clean and dry them out for each seascape or rainy shoot! In Moeraki I went through two packs of tissues because of the strong tide. At a rough estimate I would have needed around 10 cloths just for that shoot – not to mention that they don’t dry off heavy moisture half as well as Kleenex.
In that instant, when the waves are crashing in on you, you’re getting drenched, you still don’t have your shot and the light is fading fast, being able to reach in your pocket and pull out a fresh, dry Kleenex can mean the difference between a clean image and smudgy one. And to boot, I’ve had my 14-24mm lens for 3 years now, and I don’t see any damage on the lens, or image degradation. If there’s going to be damage, it really must be a SLOW process. I’m pretty sure the lens will be killed by something else, long before the Kleenex has a chance.
But just to be clear, I’m not saying we should clean our lenses with Kleenex regularly. I always use a microfiber cloth to clean my lens, with a very diluted solution of cleaner and water. I just think there is no harm in wiping water from your lens with a soft Kleenex when you’re shooting. I know some may disagree,especially glass worshipers, and will argue till the cows come home otherwise, but there’s no convincing me, I’m afraid. I will say, however, I only ever use soft Kleenex. Anything rough or patterned doesn’t go near the lens.
Anyhoo, It was nice being in this region of New Zealand. Rachel’s aunt, uncle, cousin and her children live just up the road in Oamaru. We got to hear some semi-familiar accents and eat some lovely home-cooked food. It’s been almost 2 and a half years since we were surrounded by family. It was great to step out of our travelling mindset and enter into almost-forgotten familiarity. Playing with the children also made me realise I was quite a talented Lego engineer.
After experiencing some wonderful hospitality, we’ve since said goodbye and headed over to Mt Cook. That’s where we are right now, waiting for the sky light up.
After Mt Cook I’ve decided to put my camera away and go north, where my wife and I will enjoy a little wine tour. It wouldn’t be right to visit New Zealand and not taste the local grape 🙂
________________________________________________________
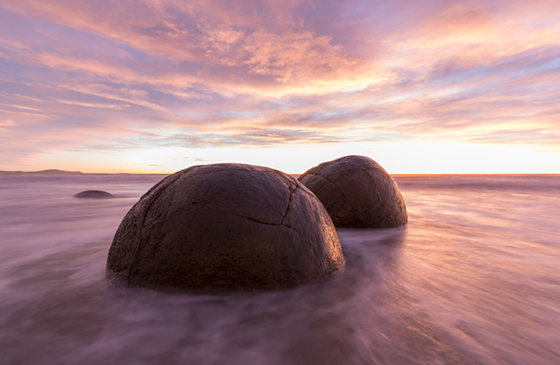
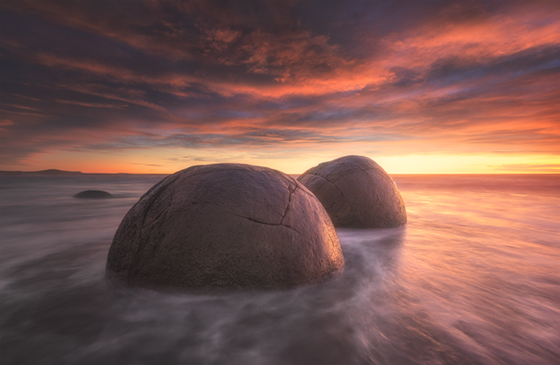
How I Created The Image – Before/After Post-Processing


The Cool Bits -Technical Info
Processing Time: 40 minutes
Exposure Blending method: Gradient Mask in Raya Pro
No. of Exposures: 2 long exposures.
EV Range: N/A
Aperture: f/4.5
ISO: 800
Focal Length: 14mm
Lens: Nikon 14-24 f/2.8
Camera: Nikon D800
Plugins: Nik Color Efex
Luminosity Masks: Used to create softer shadows and select the highlights to add more warmth to them.
Workflow Explanation – Moreaki Boulders
This image was created using Raya Pro – The Photoshop Plugin.
This image is composed of two exposures, a brighter one for the foreground and a darker one for the sky. Since the horizon was relatively flat, I used a Gradient Mask in Raya Pro, and then used the Refine Mask option just to make sure the exposures were blended nicely.
Attaching a Curves layer to the darker exposure via a clipping mask, I darkened the sky a little bit, while brightening up the highlights slightly. I then did the same for the brighter exposure, darkening most of the image a little bit, while not under exposing the shadows of the boulders.
With a Levels layer I darkened the midtones of the image while raising the shadows a wee bit. In Color Efex Pro I applied a small amount of Pro Contrast to give the clouds and boulders some extra contrast.
After those couple of contrast adjustments, I noticed that the sky on the horizon was becoming a little bit over exposed. I could have just removed the contrast adjustments in that area, but instead, to ‘recover’ the sky, and inject a little bit more colour into it, I created a Brights 3 luminosity mask from Raya Pro, which had a nice selection of that part of the sky. I then opened a Photo Filter which now had the Brights 3 mask applied to it. I chose one of the Warm Filters and boosted the Density. This basically added an extra warm band of colour on the horizon.
I wanted to really force the viewer’s eye towards the sunrise and the light bathing on the side of the boulders. To do this I created a light bleeding effect, which you can see here: Quick Photoshop Secrets 14: Light Bleeding For Warmer Images
I then dodged the side of the boulders on a new layer, set to Blend Mode Overlay, at a very low opacity. I basically painted a gentle beige colour onto the side of the rocks. The effect is subtle but, for me, it was enough.
I desaturated the foreground water quite a lot as it was a strong pink. Even to begin with it was too pink for my taste. It’s a testament to how intense this sunrise was.
I also dodged the water to brighten the white areas to add a bit more movement to the foreground.
I created my usual vignette, brightening up the area of the sunrise and darkening everything else. You can see how to do that here: Quick Photoshop Secrets 9: Awesome Vignette For a Moodier Scene.
Finally, the image was sharpened and resized using my free sharpening tools, which you can download here: Quick Photoshop Secrets 16: Perfect Sharpening & Resize for the Web
As always, I hope you found this useful.
Jimmy

This entry was posted on Sunday, April 17th, 2016 at 3:22 pm
You can follow any responses to this entry through the RSS 2.0 feed.


Well done mate! The warm and dark tones are beautiful together. Be careful with those Kleenex.
Very good again.
Excellent,as per your usual. I tend to agree with you on the kleenex as well. I believe the microfiber cloths can scratch the glass much easier than a cotton tissue ever could