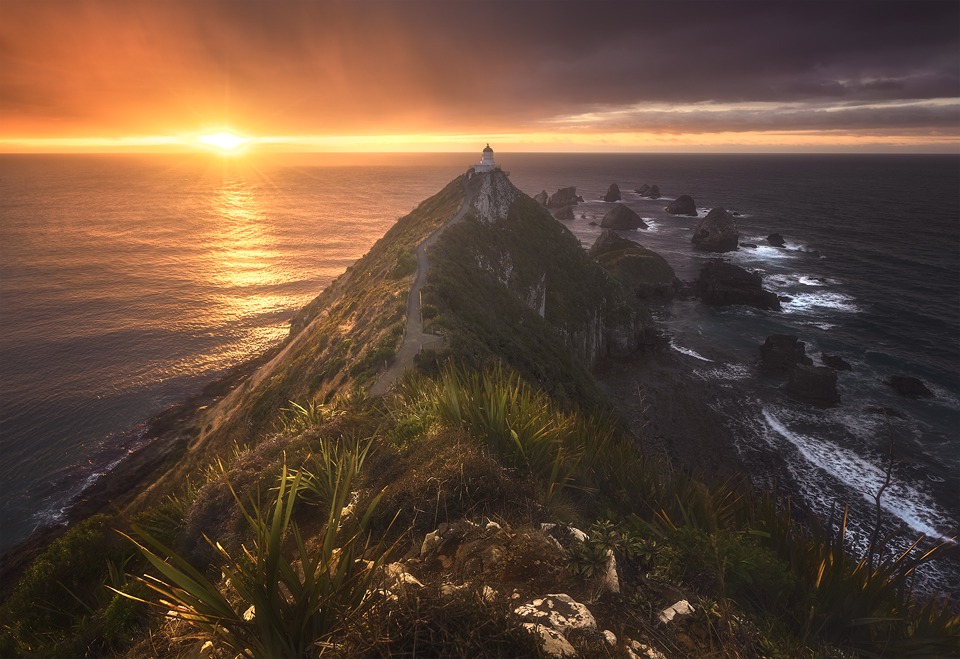
Sunrise At Nugget Point
Climbing the Point
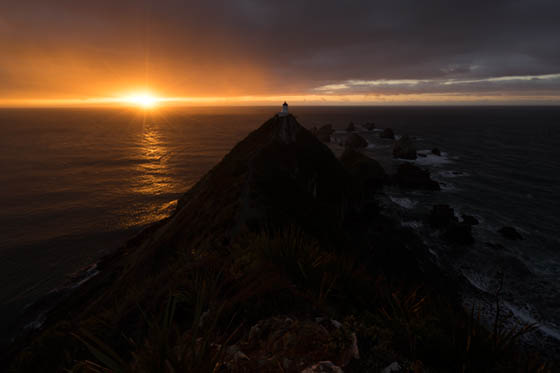
Climbing up to take this shot isn’t exactly mountain climbing, but it’s definitely a bit ropy, especially when doing it in the dark. You scramble up the side of the cliff, and then make your way ever upwards until you run low on bravery and choose your spot.
 At the point where I set up shop, to my right is a deathly fall to the rocks below, and to my left is a smaller fall down to the path below. If you fell, but pulled off an impromptu roly-poly, you might be saved by a bush or two.
I didn’t really like either options so I was extremely cautious the entire time. But when you’re up there, it is a lovely sight. You can hear the seals below playing around.
On this particular morning, I arrived early, as always, and found this spot. About 10 minutes later, I could make out another photographer climbing the cliff in the dark.
When he reached me I said ‘good morning,’ to which he just grunted back. By his expression I take it I was in ‘his’ seat. And maybe he wasn’t a morning person.
He just kept on climbing. It was raining lightly throughout the shoot, even when the sun gave us this lovely display. But it wasn’t anything major. I always keep a couple of packets of soft Kleenex handy to wipe away any rain drops on my lens.
After the shoot, the photographer above me came down. I asked if he enjoyed the beautiful sunrise. He said ‘no, coz it was f@cking raining’. He then walked off.
What I really wanted to say was, ‘cheer up mate. You’ve just witnessed a beautiful sunrise at an awesome location’. But instead I just said ‘okay, see you later’. He didn’t say anything back.
Who knows what could have happened that morning. Maybe he was just having a bad day. Maybe he’s usually a cheerful chap. Maybe he hadn’t received that morning’s caffeine hit. I would have given him a tea bag. I always have one handy, which I’ve been told is a bit strange.
But I can’t help think that some of the real beauty of photography, in my experience at least, is the journey to the location, and the experience of the location. It seemed a shame that this fella was so focused on something so small as a little bit of drizzle, that he may come away with a negative experience of Nugget Point.
Anyway, all that is pure guess work. Maybe if I see him again at another location I’ll give him one of my good tea bags, Yorkshire Tea. Or if there’s time, I’ll brew him a proper cuppa with my tea leaves. That would cheer him up.
________________________________________________________
How I Created The Image – Images Before Post-Processing
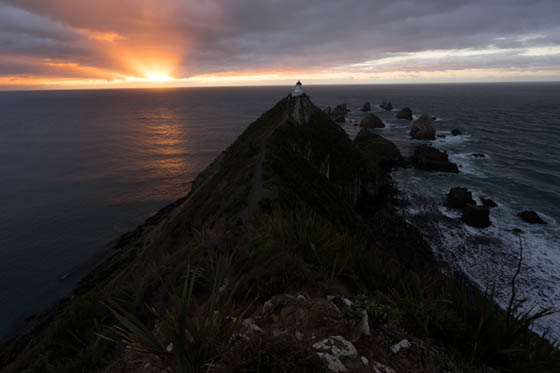
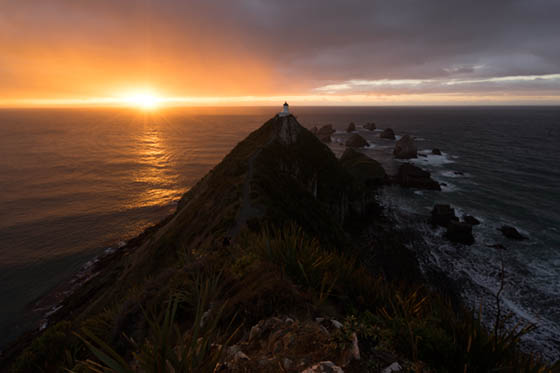
The Cool Bits -Technical Info
Processing Time: 30 minutes
Exposure Blending method: Apply Image in Raya Pro
No. of Exposures: 3 (This is a pano – 1 expo for the nearest foreground, and two for the upper image)
EV Range: 1 stop
Aperture: f/16
ISO: 100
Focal Length: 16mm
Lens: Vario Tessar 16-35 f/4
Camera: Sony A7
Plugins: Nik Color Efex
Luminosity Masks: used to create softer shadows
Workflow Explanation – Sunrise at Nugget Point
This image was created using Raya Pro – The Photoshop Plugin.
This image is a vertical panorama. I used one exposure for the nearest foreground with the white rocks and bush, but for the rest of the scene I used 2 exposures, a brighter one for the foreground and a darker one for blown out areas of the sky.
Those two exposures were blended using Apply Image Dark 3 in Raya Pro.
Photoshop didn’t like the idea of stitching the pano together because the sky between the tiles were too different. However, it was easy enough to get around.
I just cropped the foreground image all the way down to about the midway point, so that the only thing visible was the foreground and a little bit of the water. Photoshop liked this and stitched the tiles without any problem.
I was planning on shooting some wide long exposures up here. That is why I was using the Sony A7 and the 16-35 lens. I have a B+W 10-stop ND filter for this. For my Nikon I only have a 10-stop ND for my 24-70mm lens, which wasn’t wide enough for this scene. I ditched the Formatt Hitech filters for the 14-24mm a while back and will be getting something better when I get back to the UK.
If I’d had the 14-24, those extra 2mms would have probably captured everything in a single frame. But that wasn’t the case so I improvised with a pano.
I had considered just using the lower exposure as the main image because the sky was quite interesting, with the sun’s rays shooting through. But in the other exposures the overall golden impact was stronger. I might, however, reprocess this down the line and use the sky from the lower exposure with the warm foreground of the other exposures.
In terms of processing, you’ll noticed I used a darker exposures as my base exposures. I don’t feel I would have re-created the mood of the scene with something brighter. It was a dark rainy morning. Even as the sun was blasting through the clouds here, it was actually raining. So I maintained a dark, moody scene.
Most of this image was created using a series of contrast adjustments that emphasised the highlights, darkened the midtones and softened the shadows.
The I dodge areas in the foreground to exaggerate the glow from the sun, hitting the plants and rocks. I also dodged the white water on the right.
I added a touch of local contrast with Nik Color Efex’s Pro Contrast filter.
To soften the image more I used the Orton Effect from Raya Pro.
And I finished by creating a custom vignette that you can learn to do here: Quick Photoshop Secrets 9: Awesome Vignette For a Moodier Scene.
Finally, the image was sharpened and resized using my free sharpening tools, which you can download here: Quick Photoshop Secrets 16: Perfect Sharpening & Resize for the Web
As always, I hope you found this useful.
Jimmy

This entry was posted on Tuesday, April 12th, 2016 at 6:35 am
You can follow any responses to this entry through the RSS 2.0 feed.


Awesome, great shot and processing!
Great image, Jimmy. Have you made the full switch to Sony? I feel like I am the only one still holding onto and enjoying DSLRs!
Hi Brad,
Still using the D800 as the primary camera. Just like to get the Sony out when I want to do a wide angle long exposure occasionally 🙂
Nice work, and in less than optimum conditions too. I had the good fortune of spending 3 weeks in NZ this Feb on honeymoon. It is a stunning place – think we ran of superlatives within the first day of being there!
Hi Jimmy,
Love you work! I have a 16 stop hitech-formatt ND, I love using it. Did you not like yours?
Hi there,
I had the resin filters and they were really low quality, not to mention the poor customer service, sadly. There are better, and more reasonably priced ND filters out there, like Haida. They will be my next investment 🙂
That’s strange Jimmy, I had nothing but great customer service experiences with them. I have the glass filters and they are fantastic.