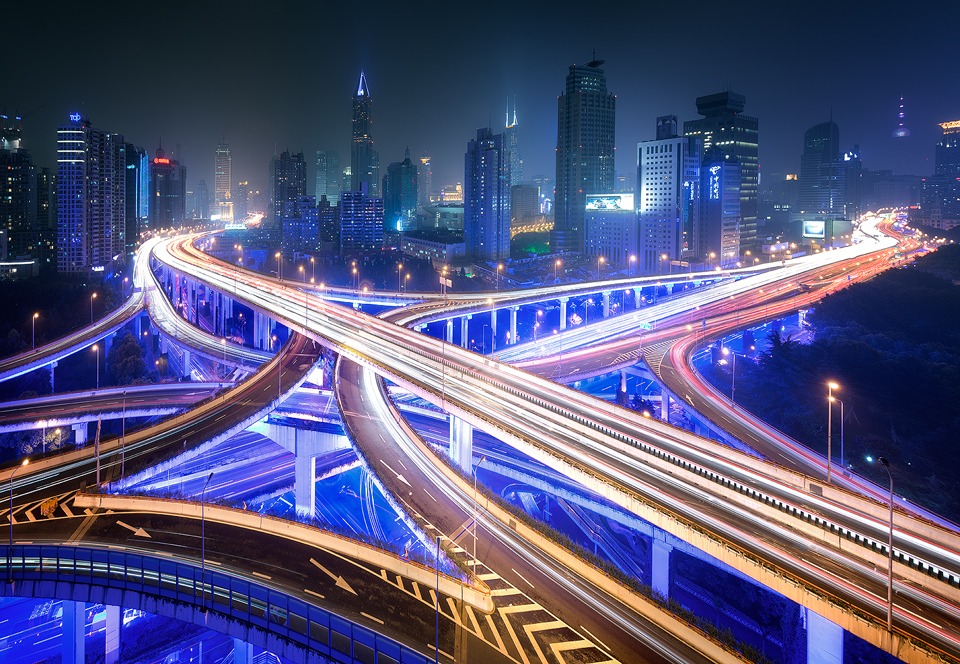
Tron – Shanghai Long Exposure
Tron, Shanghai
After getting directions off Simon Bond for the location you see above, we set off to scope it out. As soon as we arrived at the front door of the apartment block, a security guard emphatically said ‘you’re not getting up there’.
 I’d read that the locals were annoyed by the increasing number of photographers trying to shoot from the upper floors, outside their front doors, so I expected some resistance.
The security guard pulled us into his office and asked a local to translate. As the apartment block is situtated above a police station, they are now very strict about who can go in and out of the building.
I asked the translator if we could pay to get on the roof, rubbing my fingers together – the international expression for cash. The security guard strongly rejected the idea. I was panicking slightly. I was desperate for this shot. However, as the translator briefly looked away, the security guard slyly winked at me.
I felt a sudden release of tension. I had tucked away extra cash for such an occasion. Once the translator left, I grabbed a pen and paper and gave them to the security guard. He wrote the princely sum of 500 rmb, about $75 to gain access to the roof. I was more than willing to pay to that, but negotiation seems to be a way of life in China.
After many non-verbal dramatic gestures by both of us, showing just how hard up we were for cash, we settled on 300 rmb, roughly $45-$50, for the hour.
We got roof access. However, I was a little bit disappointed. These roads famously light up blue at night. What I didn’t know was that this only happens on weekends. While the scene was fun to shoot, and I was happy with the images, I knew I would have to return.
We were almost kicked off the roof early, as a German film crew turned up. They’d paid ten times what we had, and clearly their guide had over-exaggerated the exclusivity of roof access.
Their guide whined and whined, telling the security guard to remove us from the roof. I asked the film crew if they minded us being on the roof. They said they didn’t care. But clearly the Chinese guide felt he had lost face. I told him politely we had paid to stay until a certain time, and that we weren’t leaving until then.
Wanting to capture the famous blue lights, we returned the following Friday – there were different security guards this time. They wouldn’t allow us on the roof but for 100 rmb we were allowed to shoot on the upper floors for as long as we needed.
This is one of the things I love about shooting cityscapes in Asia – you can access a huge amount of ‘closed’ locations at the right price.
________________________________________________________
How I Created The Image – Before/After Post-Processing
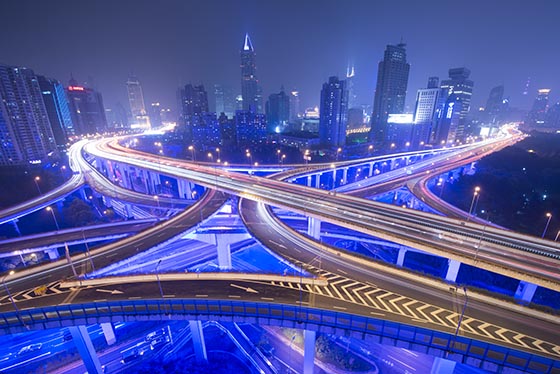
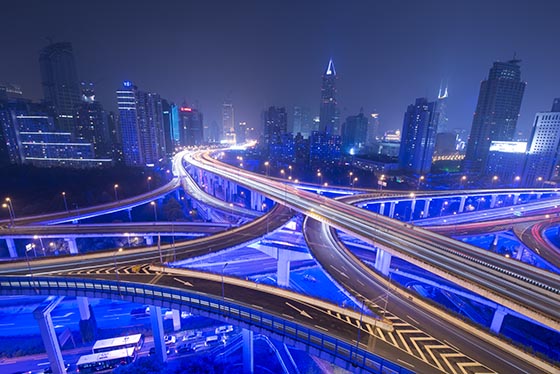
The Cool Bits -Technical Info
Processing Time: 35 minutes
Exposure Blending method: Luminosity Masks Raya Pro
No. of Exposures: 12 (2 tile, 2 exposure pano + 8 light trail exposures)
EV Range: -2, 0
Aperture: f/11
ISO: 100
Focal Length: 14mm
Lens: Nikon 14-24 f/2.8
Camera: Nikon D800
Plugins: Nik Color Efex Pro Contrast Filter
Luminosity Masks: Exposure Blending
Workflow Explanation – Tron, Shanghai
This image was created using Raya Pro – The Photoshop Plugin.
This is a 2-tile pano, each tile consisting of a base exposure, a darker exposure to control some small highlights, and 4 long exposures for the light trails.
The dark exposures were blended into the base exposure using luminosity masks in Raya Pro. To see how to blend light trails easily, please see this tutorial: How To Add Dramatic Car Trails To Your Photos In Photoshop
I always blend exposures first, then stitch the pano.
Once stitched, I corrected distortion using Edit>Transform>Distort and added some Pro Contrast from Nik Color Efex, to try to cut through the haze.
The sky was very flat, and didn’t really add anything to the image. I darkened it significantly in an attempt to focus the eye away from it, and hopefully deepen the mood slightly. I then had to make a selection of the buildings and mask this change out of the buildings, as it had left a dark edge running through them.
The whole image was far too blue. I desaturated it greatly and used the Blue Shadows button in Raya Pro. Then I used a Color Balance layer and added some greens into the sky. By removing some of the blues from the sky, it emphasised the blue of the roads below a bit more.
I added some Orton Effect (around 15%) from Raya Pro (OE2) but this time I changed the Blend Mode of the Orton Effect layer to Luminosity. This deepened the colours in the scene, darkened the image slightly, and added a soft feel.
I added mutliple Soft Vignettes from Raya Pro, each one pushing the eye closer to the light trails in the road.
When I’d finished I decided the perspective corrections had left the buildings in the background a little small. Using Free Transform, I stretched the image a small amount, making them a little bit more prominent.
I sharpened and prepared for the web using Raya Pro.

This entry was posted on Monday, September 21st, 2015 at 2:27 pm
You can follow any responses to this entry through the RSS 2.0 feed.


Jimmy,
I love your story and your picture. I’m often in China for business and went through exactly the same excersise you did on many occasion. Not so at Yan an. Here I could access an upper floor without hassle and stay up there for two hours. Here are some of my shots of that occasion: http://timecaptures.com/shanghai-yanan-elevated-city/
One time I stayed at the Langham Xintiandi Hotel. They have a few rooms that fact towards Yan An intersection. I was there on a weekend but it poured down like there was no tomorrow. Around midnight a thunderstorm came in. and woke me up. I got up and tried to get a lightning bolt for more then two hours. This is what I ended up getting: http://timecaptures.com/stormy-saturday-night-downtown-shanghai/#!lightbox%5Bauto_group1%5D/3/
At that time I did not own Raya Pro yet. Now I do and hope to get it to good use for some of my future city shot. I have to compliment you on this tool. It’s fun, easy to use and right out the easiest tool to solve some of the trickiest problems in cityscape night photography.
Continue the great work. I always enjoy your write-ups.
All the best
Rémy
http://www.timecaptures.com
Thanks for the great comments and photos Rémy!
I love the the use of the orton effect with the luminosity blend! Interesting that you blend and then stitch, I tend to stitch and then blend. Are there reasons to choose one over the other, or is it just personal preference.
Nice work here Jimmy. The image totally has the Tron look. I think I may have to watch that movie tonight after seeing this photo. Is your Raya Pro working for the latest version of PS CC on Win10? I have a trip tomorrow on HWY 2 in Washington (headed to Leavenworth for Oktoberfest). I’m thinking I’d like to try it out on some landscape images.
Hi Jimmy,
I was this summer in Shanghai and also tried to get this shot. Your story was eye opening for me. I usually have on conference trips only 1-2 nights in a city. Your perseverance and dedication (and of course post-processing technique) to get a shot is wonderful. The photos speak for themself. In my opinion one of the best that I can find in the web. Will follow you now regularly to really improve my techniques.
By the way, I like your different angle of the scene. That is unique and looks not less cool.
Thanks for your work.
Best
Werner
I went to the building next door and shot this same view from top floor window for free 🙂
Seems like a lot of roofs in Shanghai now have crude padlocks. I tried to climb the roof of several higher profile places like Le Meridien but they were locked and I saw pics from there and many other places just 3-4 years earlier.