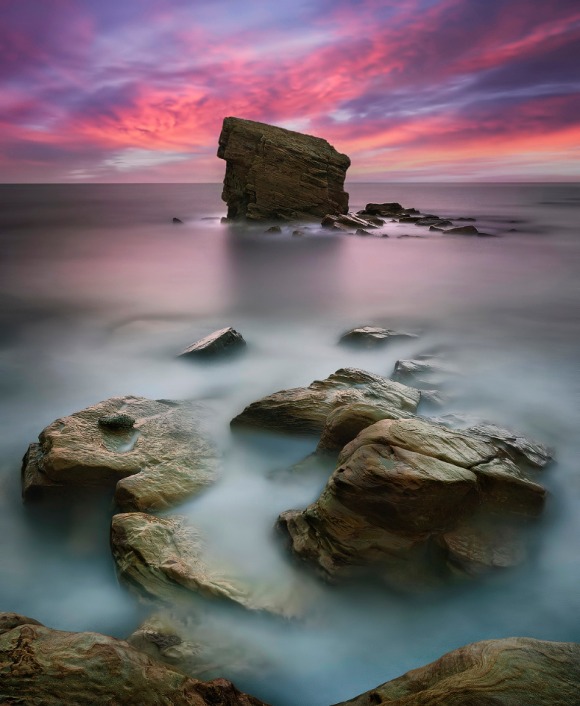
Collywell Bay

New Journal 59 – In Preparation for the Isle of Skye
On the weekend we’ll be cruising up north to spend 10 days on the Isle of Skye. Having just received news that the 14-24 lens that is due in the mail has been stolen, it looks like I won’t get the lens in time for the trip. A replacement is on its way. It’s a shame but not worth being annoyed about.
I’ll have both my d800 and 60d with me. Hopefully it’ll be a good educational trip for Rachel as she picks up a DSLR for more-or-less the first time and I do my best to coach her in this lovely world of photography. She has a very keen eye, pointing out a number of cool compositions that I then steal 🙂
In the meantime, I’m on the hunt for rugged seascapes and landscapes in the UK, particularly in Scotland. This week I’m in research mode which mostly involves me drinking coffee, daydreaming and looking at images on 500px and flickr. If you happen to be near a place we’re visiting, feel free to join us. The more the merrier 🙂
The Cool Bits – Technical Info
Processing Time: 1 hour & 35 minutes
Exposure Blending method: Rapid Blend If (RBI)
No. of Exposures: 2 + a separate image for the sky
Shutter Times: 301 & 180 seconds
ND Filter: B+W 10-stop (77mm)
EV Range: N/A
Aperture: f/8
ISO: 100
Focal Length: 10mm
Lens: Sigma 10-20mm
Camera: Canon 60d
Plugins: Nik Color Efex for change of light source, contrast adjustments, colour correction & detail enhancement
Luminance Masks: A combination of Darks 2 and Darks 4 were used to mask in details in the darker areas
Today’s Photo – Collywell Bay
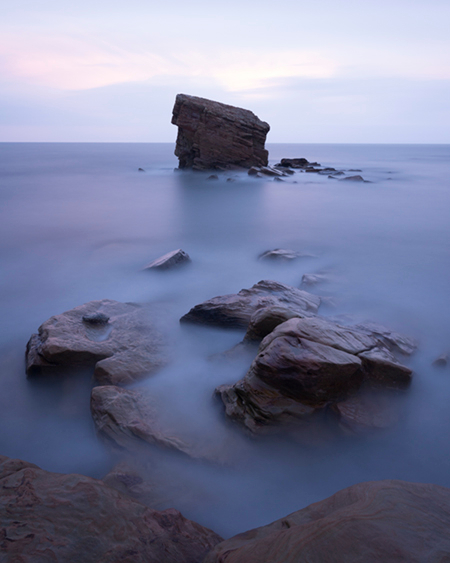
Continuing with my goal to polish my long exposure photography, I visited Collywell Bay yesterday. I took two exposures, one for the foreground and the other for the blown out sky. After blending them using the Rapid Blend If (RBI) technique (as seen in my cityscape tutorials), I decided that the sky was too flat. I replaced it with a different sky and added warm tones in certain parts of the sea to match the sky.
Using the awesome, Dynamic Contrast slider in Nik Color Efex’s Pro Contrast filter, I increased local contrast throughout the image, but added an extra layer to the foreground in order to emphasise the lighter tones of the smooth water around the rock. I applied a touch of the Dodge tool to the frothy water at the base of the rock in the background to increase the lighter tones there.
In the original shot I over-compensated for the warm cast my ND filter typically gives by creating an overly cold cast. A combination of Correct Color cast in Color Efex and a couple of Colour Balance layers in PS got the colour to where I wanted it to be.
Reminder – Download Luminance Mask Actions
You can download my 18 point luminance mask actions for Photoshop completely free – [wpdm_file id=1]
Before/After Comparison

This entry was posted on Tuesday, September 10th, 2013 at 10:15 am
You can follow any responses to this entry through the RSS 2.0 feed.


Awesome Jimmy, simply awesome. Changing the sky had a hugely dramatic impact and your colour tone massaging on the water and the rocks was spot on. I love the before/after comparison windows, they really demonstrate the importance of post processing to take photos to the next level. Brilliant as usual.
Thanks a lot David!!
Do you use Stuck on Earth? It is great for finding good photo ops.
I have used it before but it didn’t agree with me for some reason 🙂 Too many bad images on there that I crossed places off my list only to add them again when I used 500px or flickr as a research too instead 🙂
congratulations for your great photos Jimmy